Comparing the Yaesu FT-710 to the FT-DX10

N3HAL and I have been evaluating the new FT-710 AESS and the FT-DX10 transceivers for future Parks on the Air activations. According to Sherwood Engineering the front ends in both radio are rated as top performers.  

FT-710 AESS
The form factors of both radios are nearly identical while the FT-710 is slightly smaller. With this kind of transceiver, weight is somewhat of a consideration. The FT-710 is around 9+ lbs while the FT-DX10 is a hefty 13+. Taking either radio truly portable is totally out of the question. We have QRP radios for portable operations. Operating with a 100 watt rig is doable in a vehicle during inclement weather or a picnic bench on summer days.  

At Ham Radio Outlet, the FT-710 price range hovers around $1050 while the FT-DX10 is priced around $1400. The receiver design of the FT-710 is direct sampling while the FT-DX10 uses a traditional mixer front end. To compensate for the lack of direct sampling in the FT-DX10, Yaesu offers an optional roofing filter for an additional $175.

FT-DX10
The FT-DX10 has a large number of buttons and hams have complained that the buttons to the left of
the VFO are very difficult to access without knocking the radio off frequency. 

The FT-DX10 can display CW and other incoming digital information but the FT-710 lacks that feature. The FT-710 AESS feature produces better receive audio when mixing the audio between internal and matching external speaker. 

Which one will you choose?

Robert Nagy, AB5N has created an excellent, in-depth YouTube video called the FTDX-10 VS FT-710 Shootout 

72 Until Next Time - de KE2YK
 

Parks on the Air K-2147


Just a quick note. I plan to activate Sunken Meadow State Park K-2147 today, February 26th, some time around 18:00 UTC. It's a popular spot for Ham Radio operators and a watering hole for the LIQRP group. Should you hear me on the air, please spot me.

Sunken Meadow State Park is a stunning natural park located in Suffolk County, New York. The park is spread over 1,287 acres and features a range of scenic landscapes, including a beach, a saltwater marsh, and dense forests. The beach stretches for almost a mile along the Long Island Sound.

The park has hiking and biking trails through the park's forests and wetlands. For hikers, the Greenbelt Trail connects to other parks on Long Island.

Sunken Meadow State Park's history dates back to the 17th century, when it was the home of the Matinecock Native American tribe. The tribe used the area for hunting, fishing, and farming. Evidence of their presence can still be seen today.

During the 19th century, the Europeans farmed the land. New York State acquired the land in the 1920s and began developing the area into a park. The park first opened in 1931 and over the years it size was expanded. During the depression, the Conservation Corps built the park to what it has become today.

 Sunken Meadow State Park is a must visit place which offers something for everyone.

Until Next Time - 72 de KE2YK

The HB9SL 2 Element 20m VP2E QRP Antenna

 
March 5th Update:
For a change, the weather cleared on Long Island. As a result, the HB9SL VP2E got its first run. Since the antenna is allegedly directional, I pointed the 'driven element' southwest. 
 
Despite the poor 20 meter band conditions and the obstructions in my yard, I worked a New Mexico POTA station on CW. My report was 559. IMHO this may not be the best QRP antenna but the initial performance of my junk box antenna was impressive.
 
Now the VP2E is not supposed to be a QRP mulitband antenna. While I didn't use the tuner on 20 meters, I wanted to see how much my LDG IT-100 tuner would moan and groan while trying to load 40-10. Simply tuning around it's not much of a test. The point of it was to find out if I could pair the KX3 and VP2E and try operating on 'non-resonant' bands while portable.  

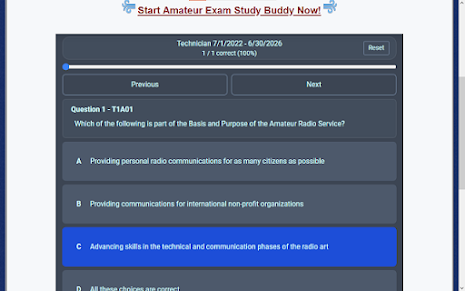
Free Amateur Radio Study Buddy


N3FJP Amateur Study Buddy is a software application that assists individuals who are preparing for their amateur radio license exams. Developed by Scott Davis, N3FJP, the Amateur Study Buddy is designed to help both beginners and experienced users get their license or upgrade their existing license by providing comprehensive study materials and practice exams.

The software contains a database of all the questions that are commonly asked in the FCC Amateur Radio License exams. It is organized in such a way that users can easily access the relevant sections and review the material at their own pace. Additionally, the program also offers interactive practice tests, which simulate the actual exam environment, giving users the opportunity to assess their level of preparedness.

What sets N3FJP Amateur Study Buddy apart from other study tools is its ease of use and accessibility. It is compatible with all major operating systems and can be installed on any computer. Users can also access the software via mobile devices, making it convenient for them to study on-the-go.

In conclusion, N3FJP Amateur Study Buddy is an excellent tool for anyone who is interested in pursuing an amateur radio license. With its extensive study material, interactive practice tests, and user-friendly interface, the software offers a comprehensive learning experience that is tailored to the needs of each individual user. Whether you are a beginner or an experienced user, the Amateur Study Buddy is a valuable resource that can help you achieve your goals in the field of amateur radio.


72 Until Next Time de KE2YK

QRPer's Need This Inexpensive Battery


Introduction:
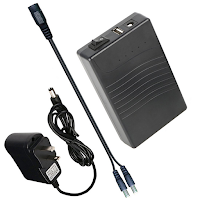
The Talentcell Rechargeable 12V 3000mAh Lithium ion Battery Pack

In today's world, we rely heavily on electronic devices such as smartphones, tablets, laptops, and cameras. These devices have become an integral part of our daily lives, and we cannot imagine a day without them. 

However, one major challenge that we face is keeping these devices charged throughout the day. This is where the Talentcell Rechargeable 12V 3000mAh Lithium ion Battery Pack comes in handy. In this article, we will discuss the features and benefits of this amazing power source.

What is the Talentcell Rechargeable 12V 3000mAh Lithium ion Battery Pack?

The Talentcell Rechargeable 12V 3000mAh Lithium ion Battery Pack (Affiliate Link) is a portable power solution that provides reliable and efficient power to small electronics and appliances. It is equipped with high-quality lithium ion battery cells and a built-in battery management system (BMS) that ensures safe and efficient operation. 

With multiple output ports, including two USB ports and a 12V DC output, this battery pack is a convenient and practical solution for powering multiple devices simultaneously. Its compact and portable design makes it easy to take with you on-the-go, making it a great choice for camping, traveling, and outdoor activities.

What are the Benefits of the Talentcell Rechargeable 12V 3000mAh Lithium ion Battery Pack?

  • High-Quality Lithium-Ion Battery Cells: The battery pack is equipped with high-quality lithium-ion battery cells that offer efficient and reliable performance.
  • Battery Management System (BMS): The built-in BMS ensures safe and efficient operation of the battery pack, protecting against overcharging, over-discharging, and short-circuiting.
  • Multiple Output Ports: The battery pack features two USB ports and a 12V DC output, which allows you to charge multiple devices simultaneously.
  • Compact and Portable Design: The battery pack is compact and lightweight, making it easy to carry with you wherever you go.
  • Long Lifespan: The battery pack has a long lifespan, making it a cost-effective and eco-friendly alternative to disposable batteries.
  • LED Indicator Lights: The battery pack features LED indicator lights that let you know the battery level and charging status.
  • Fast Charging: The battery pack supports fast charging, allowing you to quickly charge your devices on-the-go.
  • Wide Compatibility: The battery pack is compatible with a wide range of devices, including smartphones, tablets, cameras, and more.

FAQs:

Q. What devices can be charged using the Talentcell Rechargeable 12V 3000mAh Lithium ion Battery Pack?
A. The battery pack can be used to charge a wide range of devices such as smartphones, tablets, cameras, GPS devices, and
even some small appliances like LED lights and fans.
Q. How long does it take to charge the battery pack?
A. The charging time of the battery pack depends on the charger used and the remaining charge in the battery. Generally, it takes around 5-6 hours to fully charge the battery pack using a standard USB charger.
Q. What is the lifespan of the battery pack?
A. The Talentcell Rechargeable 12V 3000mAh Lithium ion Battery Pack has a long lifespan and can last up to several years with proper care. The lifespan of the battery pack also depends on the usage and storage conditions.
Q. Is the battery pack safe to use?
A. Yes, the battery pack is safe to use as it is equipped with a built-in battery management system (BMS) that ensures safe and efficient performance. The BMS protects the battery pack from overcharging, over-discharging, and short-circuiting.

Conclusion:

The Talentcell Rechargeable 12V 3000mAh Lithium ion Battery Pack (Affiliate Link) is a reliable and efficient power source for your devices. Its compact and portable design makes it easy to carry with you on-the-go, while its high-quality lithium ion battery cells ensure safe and reliable performance. 

With its multiple output ports, you can charge multiple devices simultaneously, and its built-in battery management system (BMS) ensures that the battery pack operates safely and efficiently. Whether you are camping, traveling, or simply on-the-go, the Talentcell Rechargeable 12V 3000mAh Lithium ion Battery Pack is an excellent choice for keeping your devices charged and ready to use.

KE2YK's Notes:

This compact and reliable power source is perfect for a variety of applications, from camping and outdoor activities to powering small electronics equipment.

One of its standout features is its high-quality lithium ion battery cells, which are safe and reliable. The built-in battery management system protects from overcharging, over-discharging, and short-circuiting.

With two USB ports and a 12V DC output, charging multiple devices at once makes it a great choice for powering field equipment.

The battery's compact design makes it a good companion for backpacking and field operations at parks and summits. 

Who Is KE2YK:

 Gary Utz (KE2YK) is an amateur radio operator and blogger based in New York, USA. He is the author of the blog ke2yk.com, which focuses on amateur radio topics such as antenna building, radio contests, and equipment reviews. Gary has been a licensed amateur radio operator for many years and is an active member of the amateur radio community. On his blog, he shares his experiences and insights about the hobby, as well as tips and  advice for other amateur radio enthusiasts.

How Do You Log Your POTA and SOTA Activations?

Some of the more interesting and useful storage and carry bags for traveling with QRP equipment was hosted by Josh KI6NAZ, purveyor of HRCC over on his YouTube channel recently. Tom K4SWL purveyor of QRPer.com was Josh’s guest speaker who presented a whole host of bags that he uses for travel and his POTA activations. Two companies that really stood out for me during the presentation were bags by RED OXX and Tom BIHN! All of these bags are American made with lifetime guarantees. And, of course they come with a price.

POTA activations are something I enjoy when time permits. As a result I am always on the hunt to improve my activations. During my field ops I mainly carry my Elecraft KX3, Elecraft AX1 and my Bioenno 12V 3Ah battery. Trying to minimize extra weight and provide adequate space for radio gear and necessities is always a challenge. Tom BIHN gear is definitely in my future plans.  

 Regarding field ops, IMHO, the most important gear is the log. POTA and SOTA logs are what an activation is all about! A tablet or laptop is nothing more than a huge inconvenience. When I sit down to operate it’s all about getting the job done, not tinkering around with a tab key or space bar. At home, after the activation is when I use HAMRS to enter my data and ADIF Master to validate my log. Then and only then do I upload the log to the POTA site.

 Anyway, my method of logging is plain and simple paper and pencil. Writing calls, time and state down takes enough time especially when one of those mini pileups happen! But the paper itself should not be so simple!

 So what kind paper log do I use? Well I’ve tried the clipboard and the logging sheets downloaded from various Web sites. That does not work for me either, it’s way too clumsy.

Rite in the Rain Logbook
Some time ago, my friend and fellow Ham Nehal, N3HAL gave me a Rite in the Rain 4x6 top spiral notebook.

Now if you have never heard of Rite in the Rain, you’re not alone. After recently investigating the Rite in the Rain Web site, I found they have a diverse set of products and gear for writing in far less than desirable conditions.

 If you log in places that are humid or places like POTA and SOTA where dampness or mist along with the QRM may be part of your activations, you may want to take a serious look at the Rite in the Rain line of products.

 Not only do they sell notepads but they also sell what they call kits which include a waterproof cover and special pen. Again, this gear is more expensive than you’d imagine but what good is a ruined log! Once you have the kit, only a new notebook will be needed long into the future.   

 My next purchase from Rite in the Rain will be their 973-kit which consists of an all-weather pen, a Cordura protective cover and 4.6x7 side spiral notebook.  

 Here are the Rite in the Rain general product benefits as they list on their Web site:

·       Permanent ink writes through water, sweat, grease, and mud without clumping or smearing.

·       Our scrappy notebook will survive sweat, rain, mud, snow, oil, grease, and the wear-and-tear of daily use.

·       All-purpose pockets make it easy to organize your small field essentials and safeguard your notes.

72 until next time de KE2YK

Feb 13th is World Radio Day


Vintage World Band Radio

Radio is long-standing component of mass media. Febru3ary 13th is World Radio Day and is celebrated around the world with special broadcasts, online activities, awards and events.

 Radio History:

On Nov 3, 2011, UNESCO declared February 13 as World Radio Day because on this day  Today is the day United Nations Radio was created in 1946. UNESCO then declared February 13th to be World Radio Day.

 Word Radio Day’s objective is to promote the importance of radio and to promote radio as a viable medium for sharing information. UNESCO is tasked with coordinating World Radio Day radio activities globally with all UN member countries.

 Quick Radio Facts:

  •  On May 13 1897, Guglielmo Marconi was the radio pioneer who made the first-ever radio transmission.
  •  The Radio Club of Bombay was the first to broadcast in radio in 1923.
  •  With around 400 radio stations, All India Radio is one of the largest broadcasters in the world and it covers almost all of the country’s people. 

72 until next time de KE2YK

The Elecraft AX1 Window Mount

The Elecraft AX1 Portable QRP Antenna System
Elecraft AX1 With Tripod

Introduction:

Are you someone who loves to go portable with your amateur radio equipment? If so, you know that having a reliable antenna system is crucial to communicate with other ham radio operators. 

The Elecraft AX1 antenna system is a popular choice when it comes to portability. One way to set up the AX1 which may get better results is to use a window mount with your antenna. 

In this article, we will explain why a homemade car window mount for the Elecraft AX1 antenna system might be a good choice and how to mount the Elecraft AX1 Antenna System on a car window.

Benefits of the AX1 Window Mount:

One benefit of a homemade car window mount is improving both receive and transmit signals. The Elecraft AX1 is an omnidirectional antenna which will send and receive signals from all directions. One way to help maximize signals from and to the antenna is by mounting the AX1 outside the car window. Using a few techniques you can maximize signals to and from the Elecraft AX1 Antenna System. 

A homemade car window mount allows you to position the AX1 in a way that will reduce interference from nearby objects and eliminate your body capacitance. A window mount will also improve outgoing signals as most of the antenna will be above the roofline of the car.

Another advantage is that it is easy to install. You can create your own mount using simple materials like a double BNC connector and about 12 inches of 4 inch wide bar stock. This means you can easily install and remove the mount as needed, allowing you to take your mount wherever you go.
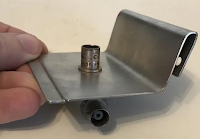
WA2AEW AX1 Window Mount
W2AEW's AX1 Window Mount

A Homebrew AX1 Window Mount:

Creating your own homemade car window mount is also cost-effective. Buying a commercial MFJ-310 window mount for your antenna system can be a bit expensive, but with just a few simple materials, you can create a sturdy and reliable mount that will improve your radio experience.

Lastly, properly designing your own sturdy homemade car window mount will ensure that the mount is properly attached and will reducing the risk of antenna damage.

If you prefer, you can use a commercial window mount (Affiliate Link) instead of a homemade one. Perhaps you have some scrap metal around, then creating your own mount can be a cost-effective and fun DIY project. A homemade car window mount should be lightweight and be designed to avoid damaging the trim and car window. 

Conclusion: 

In summary, a homemade car window mount for the Elecraft AX1 antenna system is a another fun accessory for QRP ham radio operators who enjoy going portable with their QRP equipment. 

A window mount is easy to install, cost-effective, and increases signal reception and transmissions. Don't let poor signal reception or expensive commercial mounts hold you back. With a little creativity and effort, you can build a sturdy and reliable mount that will improve your radio experience on the go. So why not give it a try? Go through your junk box and get busy creating your own AX1 window mount.

 KE2YK's Notes:

As an Elecraft AX1 user let me just say that the window mount accessory is another QRP treat! I'm here to offer you some tips for maximizing the performance of the Elecraft AX1 Antenna System on a car window mount.

First things first, take your time to securely fasten the mount to your car window before attaching the antenna. I cannot stress this enough. A wobbly or unstable mount can not only affect the performance of your antenna but may damage your vehicle. So, double-check everything before you start calling CQ.

Once your mount is in place, remember to optimize the counterpoise for the band you are going to operate. The KX line of transceivers have awesome ATU's but getting the SWR in the ballpark is important when working QRP. Don't be afraid to experiment with different mounting locations on your vehicle until you find the sweet spot that works best for you. As always, the key to optimal performance lies in fine-tuning.

So, my friend, with these tips in mind, you're all set to explore the benefits of using a car window mount with the Elecraft AX1 Antenna System. Trust me; it's a world of its own up there in the airwaves, and you're in for another QRP adventure!

Who is KE2YK:

 Gary Utz (KE2YK) is an amateur radio operator and blogger based in New York, USA. He is the author of the blog ke2yk.com and qrpshack.blogspot.com, which focuses on amateur radio topics such as antenna building, radio contests, and equipment reviews. Gary has been a licensed amateur radio operator for more than 30 years and is an active member of the amateur radio community. On his blog, he shares his experiences and insights about the hobby, as well as tips and  advice for other amateur radio enthusiasts.

Here's a List of AX1 Resources: 


AX1 POTA Alan's Window-Mounted Elecraft

https://qrper.com/2023/02/alans-window-mounted-elecraft-ax1-pota-activation/

Elecraft AX1 Test using American Radio Supply AM-801 Window Mount

https://qrper.com/2023/02/elecraft-ax1-test-using-american-radio-supply-am-801-window-mount/

The Elecraft AX1 Window Mount

https://qrpshack.blogspot.com/2023/02/the-elecrft-ax1-window-mount.html


Resource [1] describes how to mount the AX1 on a window bracket and connect it using a 25 foot length of RG-174 cable. Resource [2] features a story about using the AX1 with a tripod and running coax out the window for digital activations. Resource [3] talks about using the AX1 with a Hamstick and car roof mag mount combo for a successful activation.

 72 de KE2YK

Related Posts:

 The HB9SL 2 Element 20m VP2E QRP Antenna
The Elecraft AX1 Window Mount
The Slinky Vertical Antenna Experiment
Arborist Throw Lines For Portable Antennas
How To Build A Cheap Tilt Over Tower


Spy Communications in World War II

 The Secret War Within the War


World War II was one of the most devastating and brutal wars in history, and was fought on multiple fronts. While the main focus was on the military battles, there was a secret war being fought behind the scenes, a war of espionage and intelligence gathering. This was a war of information and secrets, and spy communications were at the heart of it all.


 The Importance of Spy Communications in World War II

Spy communications were essential for the successful prosecution of the war. They allowed the different military powers to gather and transmit sensitive information that could influence the outcome of the war. By having access to the enemy's plans and strategies, spy communications enabled military powers to respond to their adversary's moves, prepare for their tactics, and ultimately gain a strategic advantage.

For example, the successful cracking of the German Enigma code by the Allies was a major achievement in spy communications that allowed the Allies to gain insight into the enemy's plans and tactics, and disrupt their operations. This was a major turning point in the war and had a profound impact on its outcome.

Types of Spy Communications

There were several types of spy communications used during World War II, including secret writing, radio communications, and human couriers.

Secret writing involved writing messages in code or using special inks that could only be revealed under certain conditions. Examples include microdots, which were tiny dots of text that could be hidden within a larger document, invisible ink, which was made from chemicals that were not visible to the naked eye, and cipher machines, which used algorithms to encrypt messages.

Radio communications involved the use of shortwave radio and other forms of wireless communication to transmit messages. Direction finding equipment was used to locate and track enemy radio transmissions, and spies used encrypted messages to ensure the confidentiality of their communications.

Human couriers involved the use of people to physically transport messages and other forms of intelligence. Human couriers were often used to transport information that was too sensitive to be transmitted over radio or encoded in secret writing.

The Role of Spy Communications in Shaping the Outcome of World War II

Spy communications played a crucial role in shaping the outcome of World War II. They allowed military powers to gain a strategic advantage, disrupt enemy operations, and coordinate their own military operations. This, in turn, helped shape the outcome of the war and had a lasting impact on the world and the development of modern military strategy and tactics.

In conclusion, spy communications were at the heart of the secret war within World War II. They allowed the different military powers to gather and transmit sensitive information, respond to their adversary's moves, and ultimately shape the outcome of the war. Despite the risks involved, spies and intelligence agencies continued to use spy communications to support the war effort, and their contributions to the war remain an important and often overlooked aspect of World War II.

 72 until next time de KE2YK


Best Ham Radio Logging App?

 I have never been one of those guys who will break a pileup or sit for hours trying to work DX that I can hardly hear. While I have worked over 100 counties over the years, logging is a more of a fun pastime for me. On occasion, during a local CW rag chew on 20 or 40, I'll look back into the log to see if and when I have worked the station and if there are notes in the log entry.

 On a day to day basis, the N3FJP Amateur Contact Log is the app of choice for me. ACLOG is not free but it offers a direct interface with my 7300 for mode, frequency and also CW memory keying. ACLOG also has the ability to analyze and display countries, states and counties worked and those that are needed. ACLOG also provides importing and exporting of  log contents from and to Club Log, eQSL, LoTW and QRZ Logbook. I have also used N3FJP's Field Day, Winter Field Day, NA Sprint and NAQC logging apps. 

HAMRS is my go to field logging app. HAMRS is free and has several canned logging formats. The POTA or Parks on the Air format is what I use when operating from local parks with POTA numbers. HAMRS does have an easy way to export to ADIF format. For now, if using HAMRS for Winter Field Day logging when the Cabrillo format is needed, just export the HAMRS log in ADIF format and import it into N1MM logger. Then save the imported file in Cabrillo format. Perhaps the HAMRS author will provide direct Cabrillo exporting in the future. 

N1MM logger is also a free and diverse logging app. N1MM goes way beyond my needs as a logging app but it does contain a big list of canned formats for logging events. I had to experiment with N1MM to find out how to set up the canned format to enter my Winter Field Day contacts. If you don't want to mess with exporting from HAMRS and importing to N1MM logger, then N1MM logger turns out to be a good choice for Winter Field Day logging. 

While there are tons of Ham Radio logging apps around, like anything else, much depends on specific needs. I believe the N3FJP suite of apps and the N1MM logger fall into the same category as countless other Ham Radio apps. That is, the apps only run on the Windows platform. HAMRS stands alone in that category because it runs on Mac, Windows, Ubuntu and Raspian and operates identically on all platforms. 

72 es 73 until next time de KE2YK

    Here's a Snippet of my QRZ logbook uploaded directly from ACLOG.

The Neighbor Whisperer Antenna

Background:  I have an end-fed random length wire running from my house, across the yard to the back neighbor’s tree.  It runs over a branch in her tree and down to an anchor point on my fence poles.  I have operated like this for at least 20-25 years with only an occasional complaint that I was able to smooth over.  My wire is anchored on both sides with bungee cords to ground anchors.  There’s no way my wire will take down her branches.  Her tree is an enormous walnut tree.  It drops walnuts, branches, leaves and flowers all year round onto my property and into my pool.  OK – so that’s my rant, but I try to keep the peace.

Recently my wire broke from normal wear.  When I put it back up, my neighbor complained about it being in her tree.  The last storm caused branches to come down and there was a wire in one of those branches.  She feels my wire took down her branches (impossible). 

I could have gone the legal route… I can put a wire up in any branch that is hanging over my property line.  As well, I could cut down any of those branches that hang over my property line. 

As a good Ham, I didn’t want to argue legalities or anything else, so I told the neighbor I would take down my wire from that tree and come up with another way to get it up in the air.  As it is said, “Necessity is the mother of invention.” 

The next step was to figure out an alternate without involving that tree.  Then the light went on… My friend and Elmer, KE2YK, has a pole in his yard supported by 4x4 posts, and it is tilt over, just not too high.  Maybe my own pole mast would work.  I have galvanized steel poles holding up my 6’ stockade fence.  They are in a poured footing around the perimeter of my property.  There might be a light at the end of this tunnel…

I purchased three 10.5’ chain link fence top-rail poles that fit into each other.  I then tapped the cap off the back corner member of my fence support pole.  The new poles fit right inside the existing fence pole.  I inserted one 10.5’ piece of pipe into my existing fence pole.  I had 2 more poles to erect.  I fit the two of them into each other making a twenty-foot section.  The next part was tricky.  I had to attach my antenna wire to the top of the twenty-foot section and then insert it into the already-positioned ten-foot section.  All this had to be done from an eight-foot ladder.  It was very difficult to balance the 20 foot pole combo and raise it up on a ladder and then slide it into the already placed 10 foot section, but I managed to pull that off.

My original wire was 10AGU, thick and very heavy compared to the resistance of the poles.  My new mast bent like a banana in both directions (toward the house and then again across the back of my property).  Since the lower pole height and the longer wire made it longer, I had to run the wire from the top of the pole tower back down across the back of the property and anchor it to my back fence.  Another dilemma.

My random length wire was no longer random since I purchased 150 feet of 22AGU Stealth copper clad steel wire from Amateur Radio Supply.  The wire was now much longer than my previous antler (~130’).  However the wire worked great. I strung up the new wire, but it still caused mast to bend in both directions, just not quite as much. 

Next step was to come up with a guying system to pull the mast back against the pull of the wire and secure that.  I managed to pull a length of “para-chord” over a branch of a different neighbor’s tree to pull the mast back to almost up-right.  This is my final configuration.  It loads up on all bands, from 160 to 10 meters, except 6 meters, and I have been working contacts both DX and stateside ever since.  I have been working every station I intend to except a couple and I almost only run QRP (5 watts on CW). 

My wire is end-fed with ladder line from the tuner and suspended from the floor joists under the kitchen and then out through two drilled holes in the plate of the house.  One side is connected to an eight-foot ground rod, and the other end feeds the wire about two feet off the ground.  It then runs up the outside of the house to the peak of the kitchen. From there it runs all the way to the back of the property to the top of the new 30’ pole “tower.”  From the top of the pole it then runs sloped downward along the back of the property and to the fence and is anchored with a bungee to the fence post.  It’s a crazy configuration, but it works, and that’s all that matters.  It may even work better than my original end-fed random wire.  I’m happy.  My neighbor is happy.  My radios are happy.

Hams are ingenious. We come up with whatever we need to get on the air and make contacts. 

Think out of the box if you have to. You don’t have to stick to exact measurements or configurations.  They may be best, but I need to do what works for me and my situation.  

I hope to meet you on the air.

72/73

Nick – KF2P  dit dit