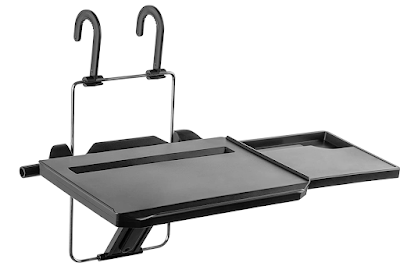
Are you a #POTA or Parks on the Air QRPer? Do you like to operate year round like me? Then you might consider picking up a Mount-It Car Desk. My car desk arrived the other day and I wanted to try it out for an activation. The weather was clear but very windy that day, so I had the excuse I needed to try out the car desk.
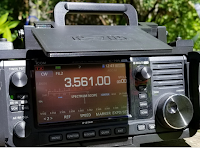
Off to Werthiem K-0481 for my first attempt. As you can see from the photo it worked out well. The car desk easily handled the weight of the rig and battery as well as my heavy hand on the KX3 QRPGUYS paddle kit. For notepad logging, the pull out side panel was also the perfect size.
If you are one of those QRP nuts like me who enjoy activating for Parks on the Air year round, the Mount-It Car Desk will an asset to you. Of course the car desk can also be mounted on the steering wheel for other uses like working a laptop or reading. Since I have plenty of time sitting in the car between appointments, the Mount-It car desk will get a workout.
In this video, Thomas K4SWL shares his experience of doing an impromptu amateur radio activation at Zebulon Vance Birthplace. Thomas is a passionate amateur radio enthusiast, and he loves to share his real-life activation videos. In this video, he shares how he sets up his radio and antenna, which he had on hand in his car, to get on the air quickly.
Thomas also explains how he picks a spot to set up his equipment in a park or a summit, which is ideal for radio transmissions. The video is a valuable resource for anyone who wants to learn about amateur radio activations, setting up radio equipment quickly, and finding good spots for radio transmissions.
Thomas K4SWL Bio:
Thomas K4SWL is an amateur radio enthusiast and blogger who shares his experiences and knowledge of the radio hobby on his blog, QRPer.com. His blog has articles on various aspects of amateur radio, including radio gear reviews, antenna building, and field operation. He also runs a YouTube channel, which has videos of his real-life amateur radio field activations.
Key Takeaways:
Setting up a radio and antenna quickly is possible with the right equipment.
Finding a good spot for radio transmissions is essential for a successful activation.
Amateur radio activations can be impromptu and fit into a busy schedule with the right planning.
Step-by-step Process:
Choose a good spot for radio transmissions.
Set up the radio and antenna quickly, preferably with equipment on hand.
Tune into a frequency and make radio transmissions.
Validate the activation by getting a response from other radio operators.
"So pretty much I've got everything I need to do a quick activation. I've got my radio kit in my backpack, I've got my antenna kit in my backpack. And so it's just a matter of deploying it and getting on the air." - Thomas K4SWL
Resources Mentioned:
Zebulon Vance Birthplace - A historic site and state park in North Carolina.
Reverse Beacon Network - A system of radio receivers that automatically detect radio transmissions and report them online.
Elecraft KX2 - A compact and lightweight portable radio for amateur radio use.
Inverted L Antenna - An antenna that uses a vertical element and a horizontal element to transmit signals.
AX1 Antenna - A compact and lightweight portable antenna designed for use with the Elecraft KX2 radio.
As an expert in amateur radio activations, my advice is to start with simple equipment and gradually build up your kit as you gain experience. Don't be afraid to try impromptu activations, but be sure to plan ahead and choose good spots for radio transmissions. And most importantly, have fun!
Additional Resources:
QRPers Unlimited: Elecraft KX2 and AX1 – Seriously, how
effectively can such a compact field kit work? [1] - This article provides a review
of the Elecraft KX2 and AX1 portable radio and antenna system, including its
compact design and effectiveness in the field.
QRPers Unlimited: Speedy POTA:
An impromptu post-hike activation with the Elecraft KX2 and AX1 [2] - This blog post details an
impromptu Parks on the Air activation using the Elecraft KX2 and AX1 antenna.
YouTube: Thomas K4SWL: Elecraft
AX1 Portable Antenna: Real-time On-air Comparison [3] - This video by Thomas K4SWL
provides a real-time comparison of the Elecraft AX1 portable antenna with other
antennas.
Thomas K4SWL School of Radio:https://k4swlschool.wordpress.com/
- This website is the home of the Thomas K4SWL School of Radio, which offers a
variety of online courses and resources for amateur radio operators.
FAQ:
What is field operating with amateur radio?
Field operating with amateur radio refers to the practice of using portable radio equipment to operate from outdoor locations, such as parks, beaches, or mountains, rather than from a fixed location such as a home or club station.
What equipment do I need for field operating?
The equipment you need for field operating includes a portable radio, antennas, power sources, and accessories such as headphones and a microphone. You can use a variety of different types of antennas, such as wire antennas or telescoping poles, depending on your location and frequency band.
What frequencies can I use for field operating?
You can use a range of frequencies for field operating, depending on your license class and the equipment you have available. Common frequencies for portable operations include the HF bands (3-30 MHz), VHF/UHF bands (30-300 MHz), and microwave bands (above 1 GHz).
How do I find other amateur radio operators to talk to when operating in the field?
You can find other amateur radio operators to talk to by tuning your radio to a frequency where other operators are known to congregate, such as a popular calling frequency or a designated frequency for a specific activity. You can also use online resources to find out about scheduled field operating events or to connect with other operators in your area.
How can I ensure my safety when operating in the field?
To ensure your safety when operating in the field, it is important to choose a safe location that is free from hazards such as power lines or steep drop-offs. You should also bring appropriate safety gear, such as a first aid kit, and let someone know where you will be and when you plan to return.
What are some tips for successful field operating?
Some tips for successful field operating include researching your location and potential propagation conditions ahead of time, practicing setting up and taking down your equipment, and experimenting with different antennas and operating techniques to find what works best for you. It's also important to stay patient and persistent, as conditions can change quickly in the field.
Do I need a special license to operate in the field?
No, you do not need a special license to operate in the field, but you do need to have a valid amateur radio license issued by the FCC in the US or a similar regulatory body in other countries. The privileges granted by your license will determine which frequencies and modes you are allowed to use while operating in the field.
KE2YK's Notes:
As an avid portable QRP amateur radio field operator, I can tell you that operating QRP portable for POTA activations can be a rewarding and enjoyable experience. Here are a few tips that can help you make the most of your next POTA activation:
Choose the Right Equipment: When operating QRP portable, it's important to choose equipment that is lightweight, compact, and reliable. Look for radios and antennas that are designed for portable use, and consider investing in a good quality battery that can power your equipment for several hours.
Scout Out Your Location: Before setting up your station, take some time to scout out your location. Look for a spot that is away from sources of interference, such as power lines or buildings. Consider the terrain and weather conditions, and be sure to choose a location that is safe and comfortable for you to operate in.
Set Up Your Station: Once you've chosen your location, it's time to set up your station. Take care to ensure that your antenna is properly tuned, and that your radio is set up correctly for the frequency and mode you'll be operating on. Be sure to follow all local rules and regulations regarding antenna height and placement.
Make Contacts: With your station set up, it's time to start making contacts! Be sure to listen carefully for other operators, and try to make as many contacts as you can. Remember to be patient and courteous, and don't be afraid to ask for repeats if you need them.
Most of All Have Fun: Finally, remember to have fun! Operating QRP portable for POTA activations can be a great way to get outside and enjoy the outdoors while pursuing your hobby. Take some time to enjoy the scenery, and make some new friends along the way.
KE2YKs Bio:
Gary Utz (KE2YK) is an amateur radio operator and blogger based in New York, USA. He is the author of the blog ke2yk.com and qrpshack.blogspot.com, which focuses on amateur radio topics such as antenna building, radio contests, and equipment reviews. Gary has been a licensed amateur radio operator for more than 30 years and is an active member of the amateur radio community. On his blog, he shares his experiences and insights about the hobby, as well as tips and advice for other amateur radio enthusiasts.
Protect Your ICOM IC-705, Xiegu X5105, or Xiegu X6100 with Mike N2HTT's 3D Printed Cases
Introduction:
As a ham radio operator, protecting your equipment is of utmost importance. That's why Mike N2HTT, a fellow operator, has taken matters into his own hands by designing and creating 3D printed protective cases for the ICOM IC-705, Xiegu X5105, and Xiegu X6100 QRP radios.
These cases not only provide protection from bumps and scratches but also add a unique touch to your equipment. And the best part? Mike now sells his creations at his HamGear3d Shop for fellow operators to enjoy.
In this article, we'll dive into the benefits of using Mike N2HTT's 3D printed cases for your QRP radios and what sets them apart from other protective cases on the market.
Why Choose Mike N2HTT's 3D Printed Cases?
Unique Design
Mike's 3D printed cases are not your typical protective cases. They're designed with the operator in mind, featuring intricate details and a sleek, modern look that stands out from other cases on the market.
Custom Fit
These cases are designed specifically for the ICOM IC-705, Xiegu X5105, and Xiegu X6100 radios, providing a snug and secure fit. The cases also allow for easy access to all buttons, ports, and screens, making it easy to operate your radio while it's protected.
Durable Material
Mike's cases are made from high-quality PLA filament, which is known for its durability and resistance to impacts. This means that your radio will be protected from bumps and drops, ensuring it stays safe and functional for years to come.
Affordable Price
Despite their unique design and high-quality material, Mike's cases are affordable and won't break the bank. At HamGear3d Shop, you can purchase a case for your QRP radio for a fraction of the cost of other protective cases on the market.
Frequently Asked Questions:
Q: Are Mike N2HTT's cases only available for the ICOM IC-705, Xiegu X5105, and Xiegu X6100 radios? A: Yes, these cases are specifically designed for these three radios. Q: Can I customize the design of my case? A: At this time, customization options are not available. However, Mike's cases come in a variety of colors to choose from. Q: How long does it take to receive my order? A: Mike ships his cases within 2-3 business days of receiving your order. Shipping times vary depending on your location.
Conclusion:
If you're looking for a unique, custom-fit, and affordable protective case for your ICOM IC-705, Xiegu X5105, or Xiegu X6100 QRP radio, look no further than Mike N2HTT's 3D printed cases. These cases provide the perfect combination of style and function, ensuring that your radio stays safe and protected while in use. Don't hesitate to check out HamGear3d Shop to purchase your very own protective case today.
Who Is Mike, N2HTT
Mike N2HTT is an amateur radio enthusiast who designs and sells 3D printed protective cases for QRP radios, specifically for the ICOM IC-705, Xiegu X5105, and Xiegu X6100 models. He runs a shop called HamGear3d where he sells his custom-fit protective cases to other amateur radio enthusiasts. His cases are known for being affordable, durable, and stylish, providing protection to QRP radios during transport and outdoor use.
KE2YK's Notes:
If you're an expert on 3D printed cases, you likely know that these cases have become increasingly popular in recent years due to the numerous benefits they offer. Here are some tips and advice to keep in mind when it comes to 3D printed cases:
Material matters: When choosing a material for your 3D printed case, consider the environment in which it will be used. PLA is a popular material due to its affordability and ease of printing, but it may not be the best choice for outdoor use or extreme temperatures. ABS, PETG, and nylon are other materials that may offer better durability and weather resistance.
Quality matters: Not all 3D printers are created equal, and the quality of your printed case can depend on the printer used. Make sure to choose a printer that can produce high-quality prints with a high level of detail. It's also important to use the correct print settings, including layer height, infill density, and print speed.
Design matters: The design of your 3D printed case can impact its functionality and aesthetics. Consider factors such as the size and shape of your device, the location of ports and buttons, and any additional features such as ventilation or mounting options. You may want to use a 3D modeling program to create your design, or you can find pre-made designs online.
Customization matters: One of the greatest benefits of 3D printed cases is their ability to be customized to fit specific devices or personal preferences. You can create a custom fit for your device by measuring it precisely, or you can customize the design by adding your own logos, graphics, or patterns.
Protection matters: Whether you're using your 3D printed case for outdoor activities or daily use, it's important to ensure it provides adequate protection for your device. Consider factors such as shock absorption, water resistance, and scratch protection when choosing your design and materials.
IMHO, 3D printed cases can offer a great solution for protecting your devices while also allowing for customization and personalization. With the right materials, design, and printing techniques, you can create a case that not only looks great but also provides the necessary protection for your device.
Who Is KE2YK:
Gary Utz (KE2YK) is an amateur radio operator and blogger based in New York, USA. He is the author of the blog ke2yk.com, which focuses on amateur radio topics such as antenna building, radio contests, and equipment reviews. Gary has been a licensed amateur radio operator for many years and is an active member of the amateur radio community. On his blog, he shares his experiences and insights about the hobby, as well as tips and advice for other amateur radio enthusiasts.
In today's world, we rely heavily on electronic devices such as smartphones, tablets, laptops, and cameras. These devices have become an integral part of our daily lives, and we cannot imagine a day without them.
However, one major challenge that we face is keeping these devices charged throughout the day. This is where the Talentcell Rechargeable 12V 3000mAh Lithium ion Battery Pack comes in handy. In this article, we will discuss the features and benefits of this amazing power source.
What is the Talentcell Rechargeable 12V 3000mAh Lithium ion Battery Pack?
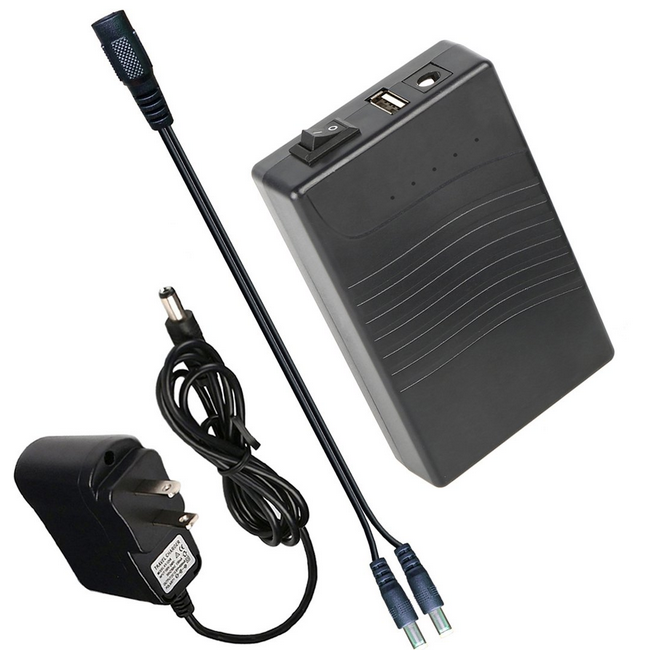
The Talentcell Rechargeable 12V 3000mAh Lithium ion Battery Pack (Affiliate Link) is a portable power solution that provides reliable and efficient power to small electronics and appliances. It is equipped with high-quality lithium ion battery cells and a built-in battery management system (BMS) that ensures safe and efficient operation.
With multiple output ports, including two USB ports and a 12V DC output, this battery pack is a convenient and practical solution for powering multiple devices simultaneously. Its compact and portable design makes it easy to take with you on-the-go, making it a great choice for camping, traveling, and outdoor activities.
What are the Benefits of the Talentcell Rechargeable 12V 3000mAh Lithium ion Battery Pack?
High-Quality Lithium-Ion Battery Cells: The battery pack is equipped with high-quality lithium-ion battery cells that offer efficient and reliable performance.
Battery Management System (BMS): The built-in BMS ensures safe and efficient operation of the battery pack, protecting against overcharging, over-discharging, and short-circuiting.
Multiple Output Ports: The battery pack features two USB ports and a 12V DC output, which allows you to charge multiple devices simultaneously.
Compact and Portable Design: The battery pack is compact and lightweight, making it easy to carry with you wherever you go.
Long Lifespan: The battery pack has a long lifespan, making it a cost-effective and eco-friendly alternative to disposable batteries.
LED Indicator Lights: The battery pack features LED indicator lights that let you know the battery level and charging status.
Fast Charging: The battery pack supports fast charging, allowing you to quickly charge your devices on-the-go.
Wide Compatibility: The battery pack is compatible with a wide range of devices, including smartphones, tablets, cameras, and more.
FAQs:
Q. What devices can be charged using the Talentcell Rechargeable 12V 3000mAh Lithium ion Battery Pack? A. The battery pack can be used to charge a wide range of devices such as smartphones, tablets, cameras, GPS devices, and even some small appliances like LED lights and fans. Q. How long does it take to charge the battery pack? A. The charging time of the battery pack depends on the charger used and the remaining charge in the battery. Generally, it takes around 5-6 hours to fully charge the battery pack using a standard USB charger. Q. What is the lifespan of the battery pack? A. The Talentcell Rechargeable 12V 3000mAh Lithium ion Battery Pack has a long lifespan and can last up to several years with proper care. The lifespan of the battery pack also depends on the usage and storage conditions. Q. Is the battery pack safe to use? A. Yes, the battery pack is safe to use as it is equipped with a built-in battery management system (BMS) that ensures safe and efficient performance. The BMS protects the battery pack from overcharging, over-discharging, and short-circuiting.
Conclusion:
The Talentcell Rechargeable 12V 3000mAh Lithium ion Battery Pack (Affiliate Link) is a reliable and efficient power source for your devices. Its compact and portable design makes it easy to carry with you on-the-go, while its high-quality lithium ion battery cells ensure safe and reliable performance.
With its multiple output ports, you can charge multiple devices simultaneously, and its built-in battery management system (BMS) ensures that the battery pack operates safely and efficiently. Whether you are camping, traveling, or simply on-the-go, the Talentcell Rechargeable 12V 3000mAh Lithium ion Battery Pack is an excellent choice for keeping your devices charged and ready to use.
KE2YK's Notes:
This compact and reliable power source is perfect for a variety of applications, from camping and outdoor activities to powering small electronics equipment.
One of its standout features is its high-quality lithium ion battery cells, which are safe and reliable. The built-in battery management system protects from overcharging, over-discharging, and short-circuiting.
With two USB ports and a 12V DC output, charging multiple devices at once makes it a great choice for powering field equipment.
The battery's compact design makes it a good companion for backpacking and field operations at parks and summits.
Who Is KE2YK:
Gary Utz (KE2YK) is an amateur radio operator and blogger based in New York, USA. He is the author of the blog ke2yk.com, which focuses on amateur radio topics such as antenna building, radio contests, and equipment reviews. Gary has been a licensed amateur radio operator for many years and is an active member of the amateur radio community. On his blog, he shares his experiences and insights about the hobby, as well as tips and advice for other amateur radio enthusiasts.
Are you someone who loves to go portable with your amateur radio
equipment? If so, you know that having a reliable antenna system is crucial to
communicate with other ham radio operators.
The Elecraft AX1 antenna system is a
popular choice when it comes to portability. One way to set up the AX1 which may get better results is to use a window mount with your antenna.
In this article, we will
explain why a homemade car window mount for the Elecraft AX1 antenna system might be a good choice and how to mount the Elecraft AX1 Antenna System on a car window.
Benefits of the AX1 Window Mount:
One benefit of a homemade car window mount is improving both receive and transmit signals. The Elecraft AX1 is an omnidirectional antenna which will send and receive
signals from all directions. One way to help maximize signals from and to the antenna is by mounting the AX1 outside the car window. Using a few techniques you can maximize signals to and from the Elecraft AX1 Antenna System.
A homemade car window mount
allows you to position the AX1 in a way that will reduce interference from nearby objects and eliminate your body capacitance. A window mount will also improve outgoing signals as most of the antenna will be above the roofline of the car.
Another advantage is that it is easy to install. You can
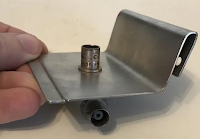
create your own mount using simple materials like a double BNC connector and about 12 inches of 4 inch wide bar stock. This means you can easily install and
remove the mount as needed, allowing you to take your mount wherever you go.
W2AEW's AX1 Window Mount
A Homebrew AX1 Window Mount:
Creating your own homemade car window mount is also
cost-effective. Buying a commercial MFJ-310 window mount for your antenna system can be a bit expensive, but with just a few simple materials, you can create a sturdy and
reliable mount that will improve your radio experience.
Lastly, properly designing your own sturdy homemade car window mount will ensure that the
mount is properly attached and will reducing the risk of antenna damage.
If you prefer, you can use a commercial window mount(Affiliate Link) instead
of a homemade one. Perhaps you have some scrap metal around, then creating your own mount can be a cost-effective and
fun DIY project. A homemade car window mount should be lightweight and be designed to avoid damaging the trim and car window.
Conclusion:
In summary, a homemade car window mount for the Elecraft AX1
antenna system is a another fun accessory for QRP ham radio operators who enjoy going portable with
their QRP equipment.
A window mount is easy to install, cost-effective, and increases signal
reception and transmissions. Don't let poor signal reception or expensive commercial
mounts hold you back. With a little creativity and effort, you can build a
sturdy and reliable mount that will improve your radio experience on the go. So
why not give it a try? Go through your junk box and get busy creating your own AX1 window mount.
KE2YK's Notes:
As an Elecraft AX1 user let me just say that the window mount accessory is another QRP treat! I'm here to offer you some tips for maximizing the performance of the Elecraft AX1 Antenna System on a car window mount.
First things first, take your time to securely fasten the mount to your car window before attaching the antenna. I cannot stress this enough. A wobbly or unstable mount can not only affect the performance of your antenna but may damage your vehicle. So, double-check everything before you start calling CQ.
Once your mount is in place, remember to optimize the counterpoise for the band you are going to operate. The KX line of transceivers have awesome ATU's but getting the SWR in the ballpark is important when working QRP. Don't be afraid to experiment with different mounting locations on your vehicle until you find the sweet spot that works best for you. As always, the key to optimal performance lies in fine-tuning.
So, my friend, with these tips in mind, you're all set to explore the benefits of using a car window mount with the Elecraft AX1 Antenna System. Trust me; it's a world of its own up there in the airwaves, and you're in for another QRP adventure!
Who is KE2YK:
Gary Utz (KE2YK) is an amateur radio operator and blogger based in New York, USA. He is the author of the blog ke2yk.com and qrpshack.blogspot.com, which focuses on amateur radio topics such as antenna building, radio contests, and equipment reviews. Gary has been a licensed amateur radio operator for more than 30 years and is an active member of the amateur radio community. On his blog, he shares his experiences and insights about the hobby, as well as tips and advice for other amateur radio enthusiasts.
Resource [1] describes how to mount the
AX1 on a window bracket and connect it using a 25 foot length of RG-174 cable.
Resource [2] features a story about
using the AX1 with a tripod and running coax out the window for digital
activations. Resource [3] talks about using the AX1
with a Hamstick and car roof mag mount combo for a successful activation.